
How to send a single message
Manual Messages are created by myGP Connect users and can be sent to any contact available within myGP Connect, or to any pre-planned group.
To send a regular manual message to a patient using myGP Connect, please do the following steps:
- Log in to your myGP Connect system
- Click on Campaigns found on the left-hand side menu
- Click on New Message
- You will be directed to the Select Recipients page
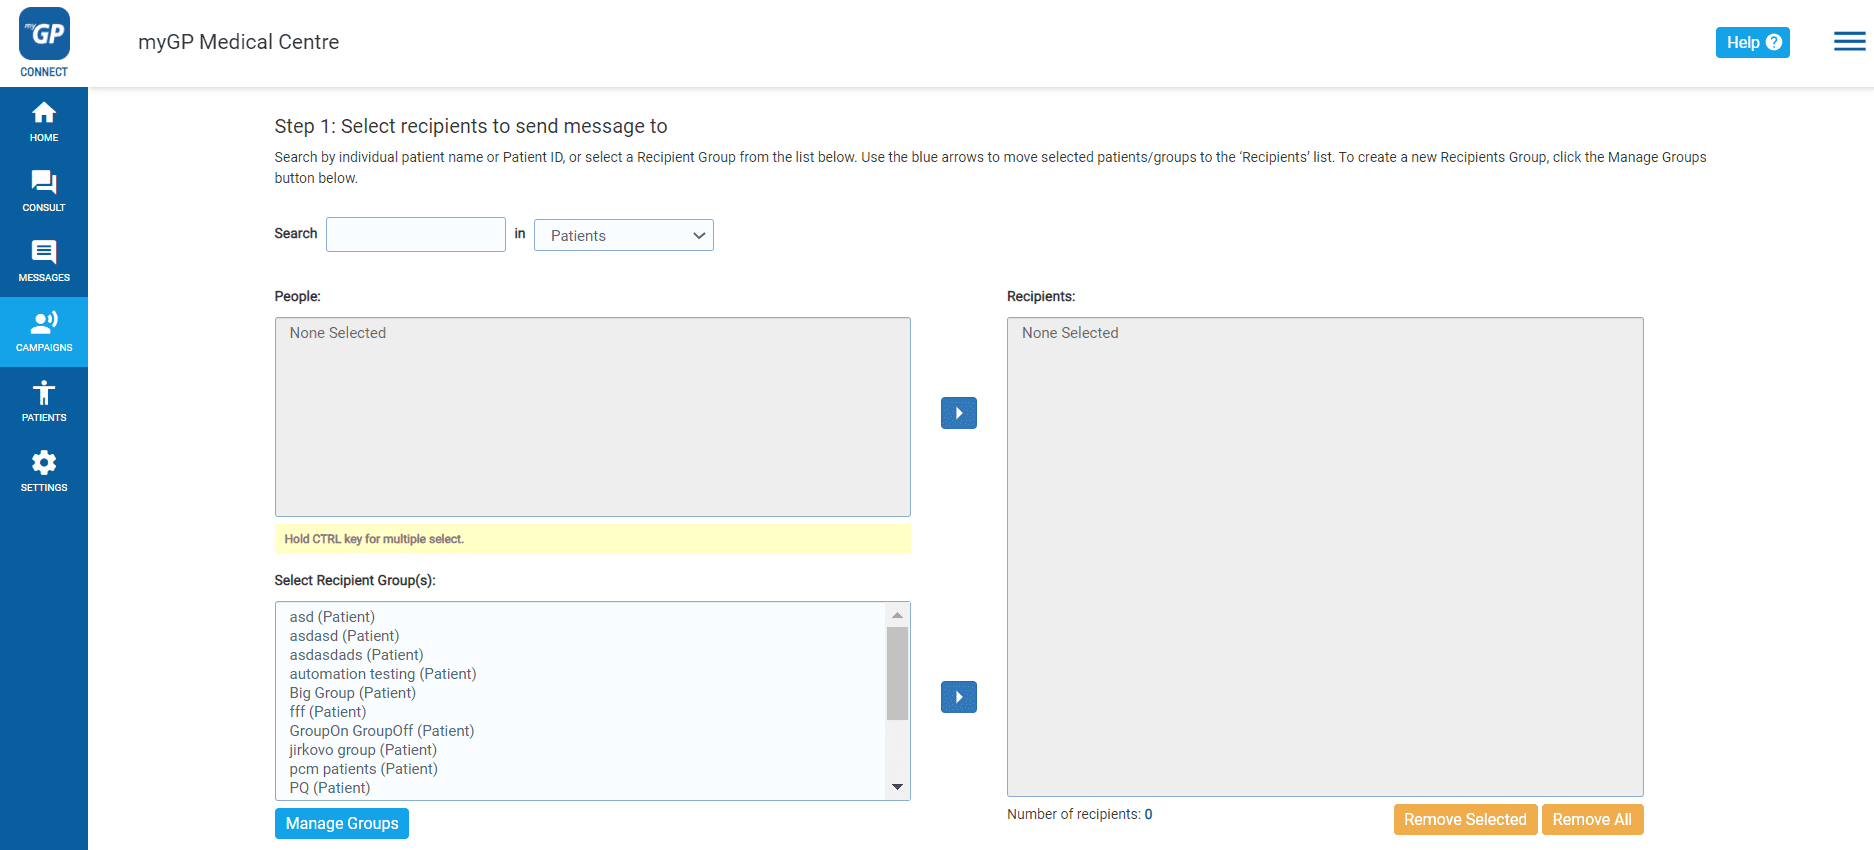
On this page you can select the recipients for your message. To action this, do the following steps:
- Click on the Search field
- Type in the patient’s NHS number, first name, or surname, in this field
- Your patient’s name will automatically appear in the People box below
- Select the patient’s entry from this box and click the Move Selected arrow to the right
- This will move you patients entry and details to the Recipients box to the right
- Now click Next at the lower right of the page
This will direct you to the Create Message page.

On this page, we will be able to assigned the text message we wish to send to the patient. In order to action, please follow the next steps: If you wish to use a template
- Refer to the Templates box on left
- Find your pre-set template and select the text itself
- Click the Move Selected arrow
- This will move your template to the Message box to the right
- Click on Next
If you wish to free-hand type a message
- Click on the Message box to the right
- Free-hand type the message you wish to send
- Click Next
Please Note: If your message exceeds 160 characters, it will cost more then 1 credit to be sent out. A pop-up will appear to notify you of this. Click OK to proceed.
You will now be brought directly to the Sending Options page. This is the final step to send out the message.
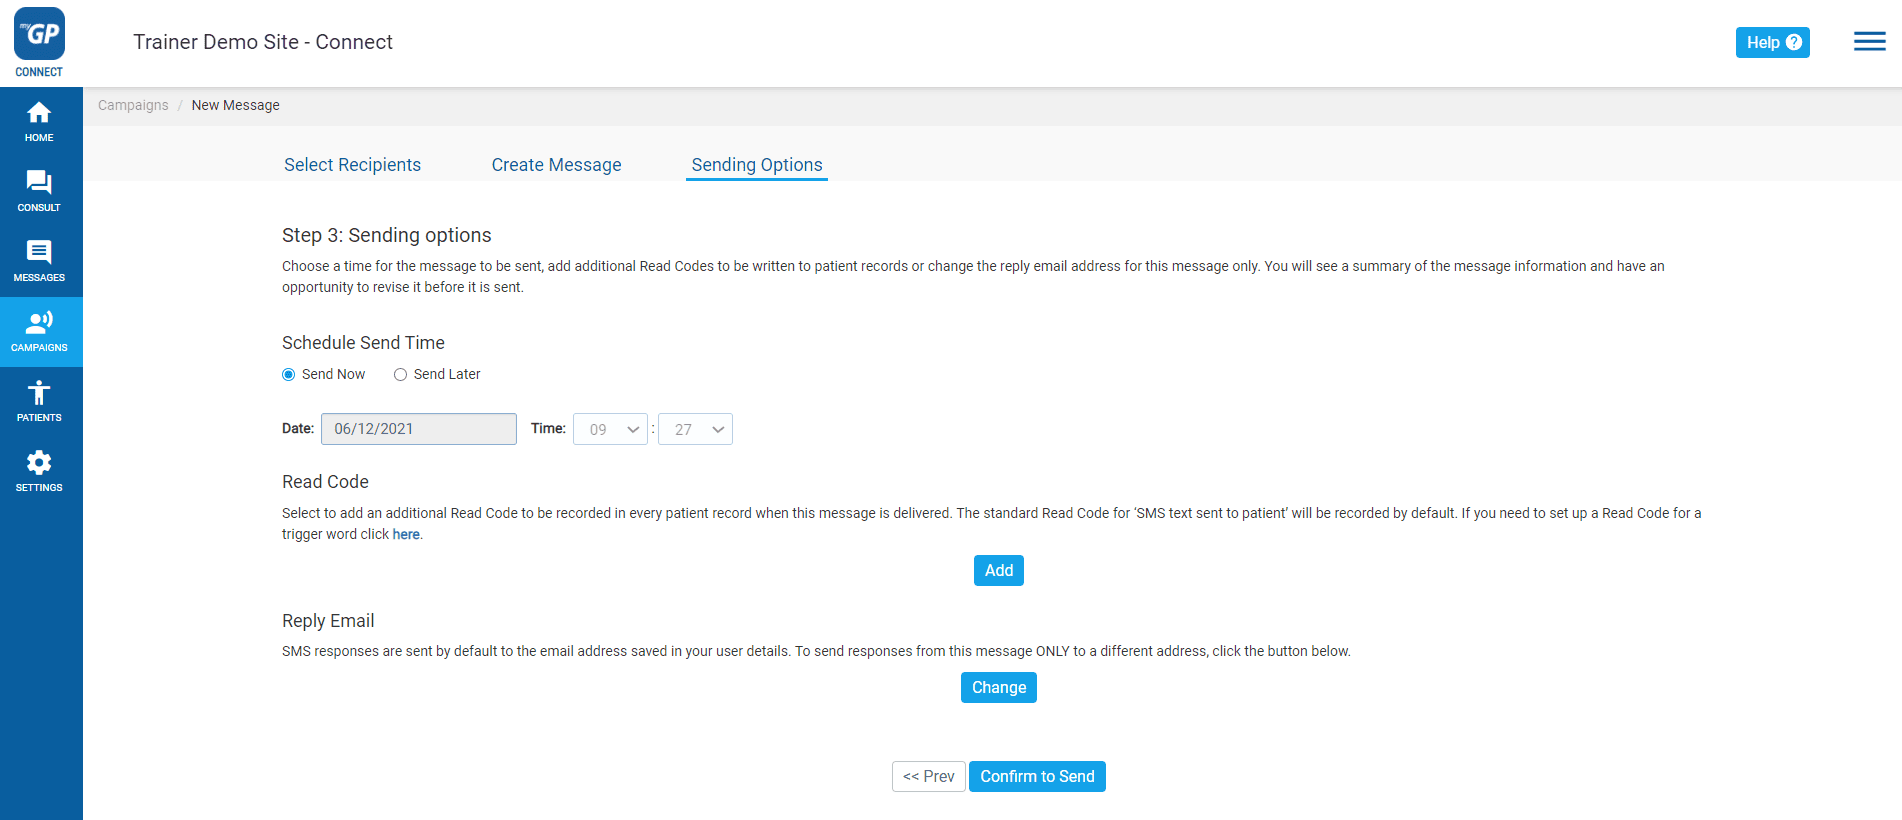
Please do the following:
- Choose your Sending Options
- Assign a clinical code with Read Code if necessary
- Reassign the Reply Email if necessary
- Click Confirm to Send
- You will receive a Message Confirmation Summary
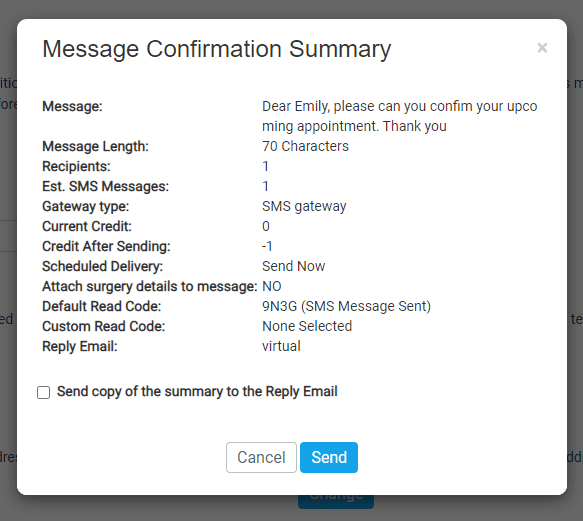
This pop-up will summarise all necessary information concerning the message you wish to send, allowing you to double check it is correct before sending. Now do the final step:
- Click Send
- You will receive a confirmation pop-up message
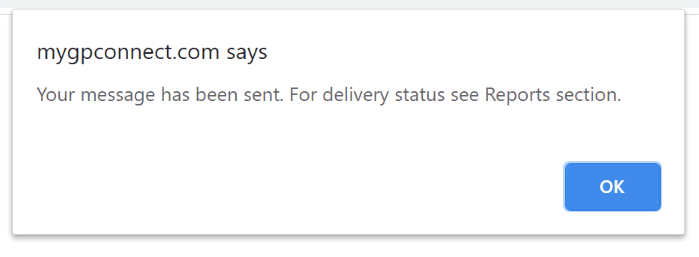
- Click OK
Your message has now been sent.