
How to send out a Patient Questionnaire?
Sending a Patient Questionnaire from iPLATO
Selecting your group
- Log in to your myGP Connect system
- Create the group that you would like to send to, if you have not created a group before, CLICK HERE to see how.
- Click on Campaigns found on the left-hand side menu
- Click on New Message
- You will be directed to the Select Recipients page
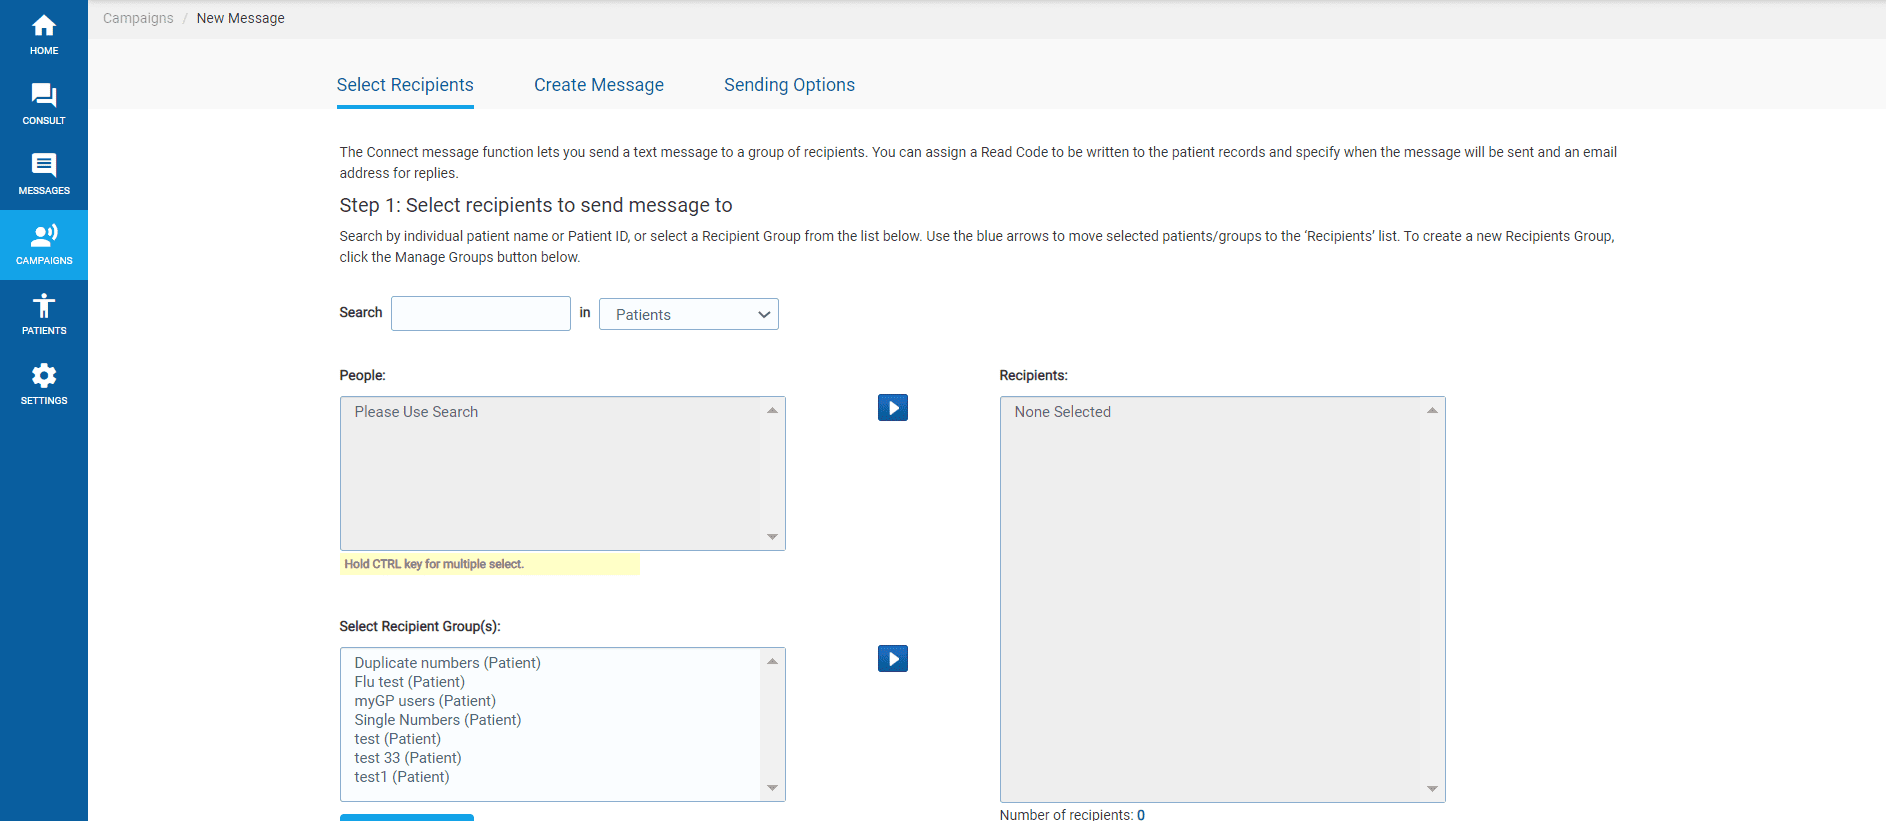
- Refer to the Select Recipient Group(s) box on the bottom left
- Any Group you have created will appear here
- Select your group name and then click the Move Selected arrow to the right
- This will move your group’s names and details to the Recipients box to the right
- Now click Next at the lower right of the page
This will direct you to the Create Message page:
Selecting your questionnaire
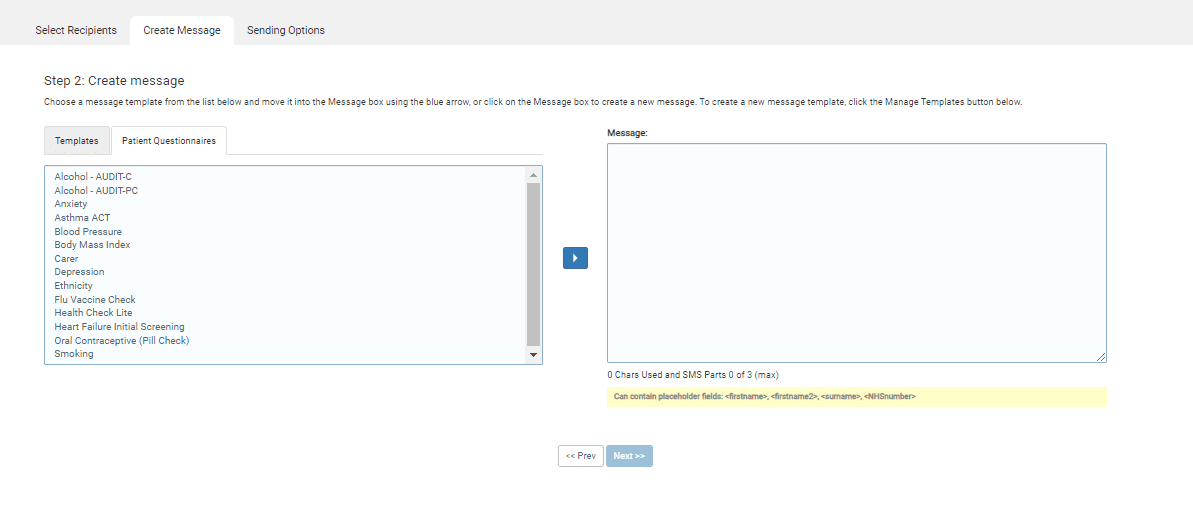
- Select Patient Questionnaire
- Available questionnaires will appear in the box
- Select your questionnaire name and click on the Arrow icon to the right
- The default questionnaire text will appear in the box to the right
- Click Next
TOP TIP: The default text has been designed to be under 160 characters and only cost 1 SMS credit to send. However, you can amend the default text, for example, you can add in your practice name. Please be aware that if you go over 160 characters the message will be sent as more than one part and cost more than 1 SMS credit to send.
Please Note: You must not change the <PatientQuestionnaireLink> mail merge.
- This will bring you to the Sending Options page:
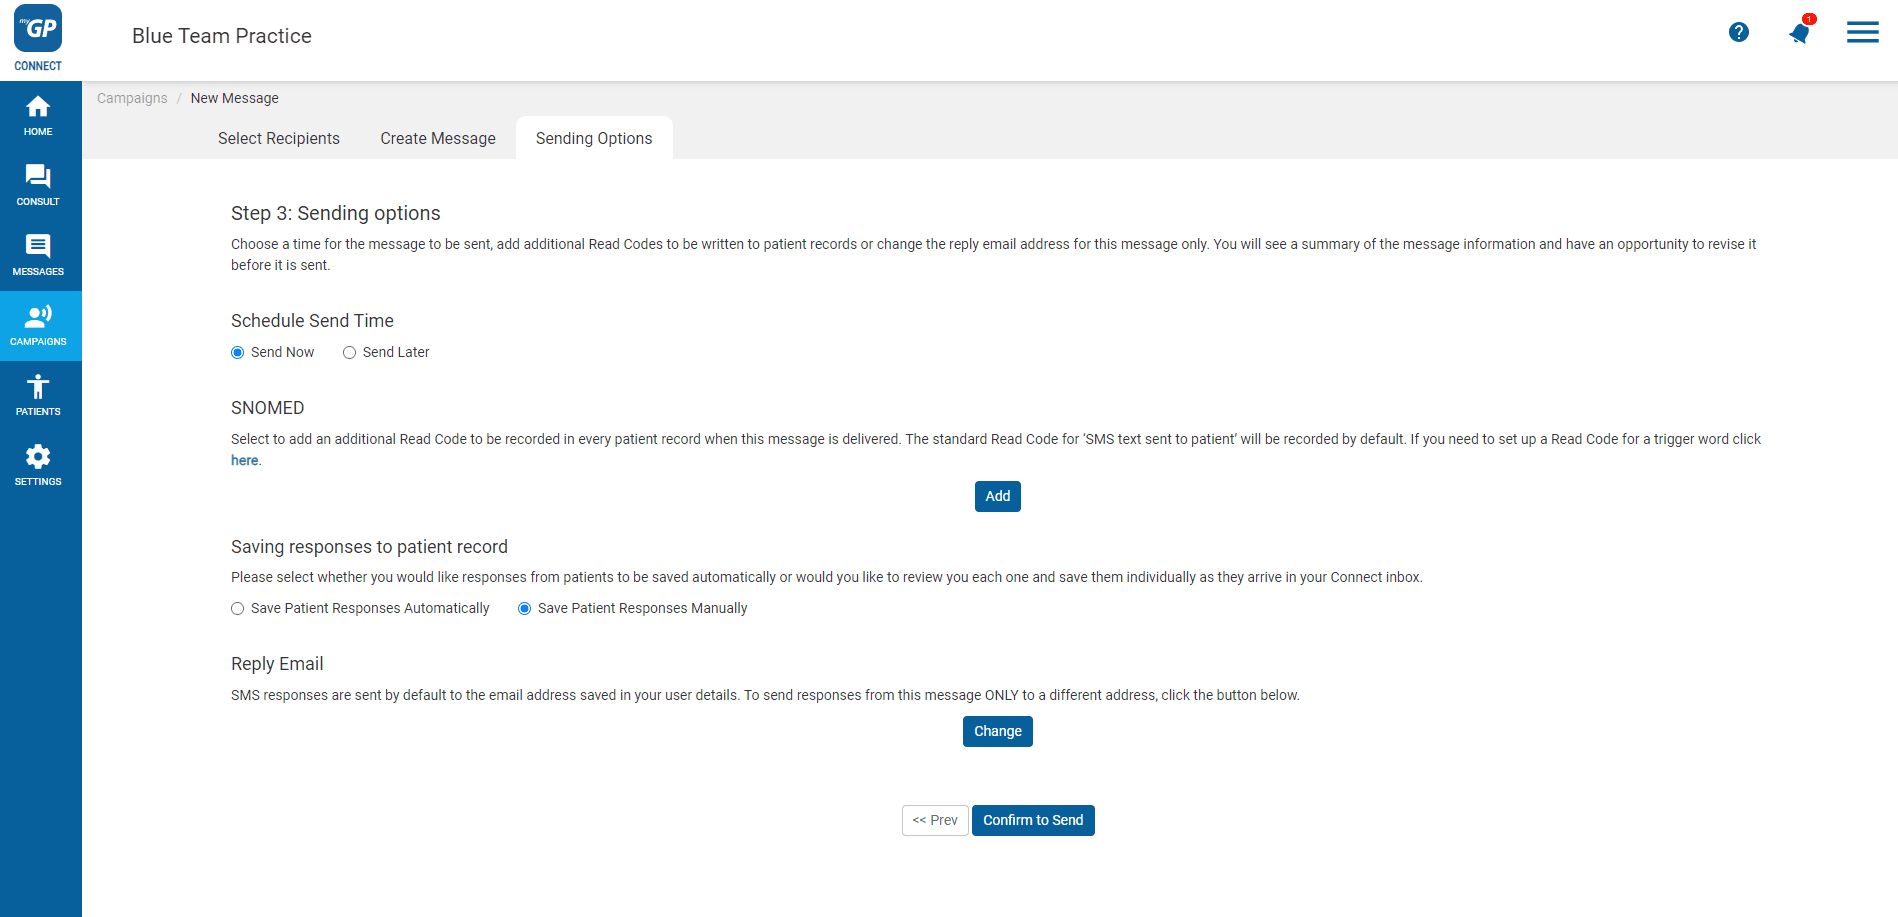
Choose your Sending Options
- Choose to Send Now or select a date and time for the message to be sent
- Assign an additional clinical code to the messaging being sent by clicking on Add (if needed)
- Choose your preference from Saving responses to patient record
- Click Confirm to Send
- You will receive a Message Confirmation Summary
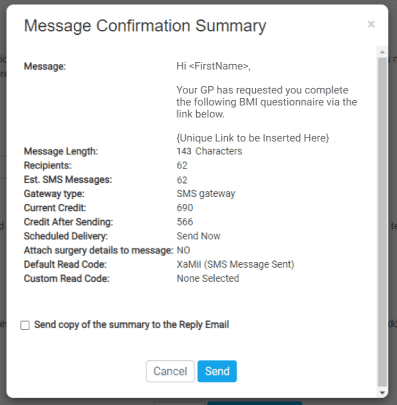
This pop-up will summarise all necessary information concerning the message you wish to send, allowing you to double-check it is correct before sending. Now do the final step:
- Click Send