
How to assign a clinical code to your message
You are able to assign a clinical code to a message sent out, by doing this, myGP Connect will send this code back to your patient’s record over on your clinical system.
We are compatible with both Read Codes and Snomed codes and you can action this feature by doing the same exact steps.
In order to assign a clinical code to the message you send out, follow these steps:
- Log in to your myGP Connect system
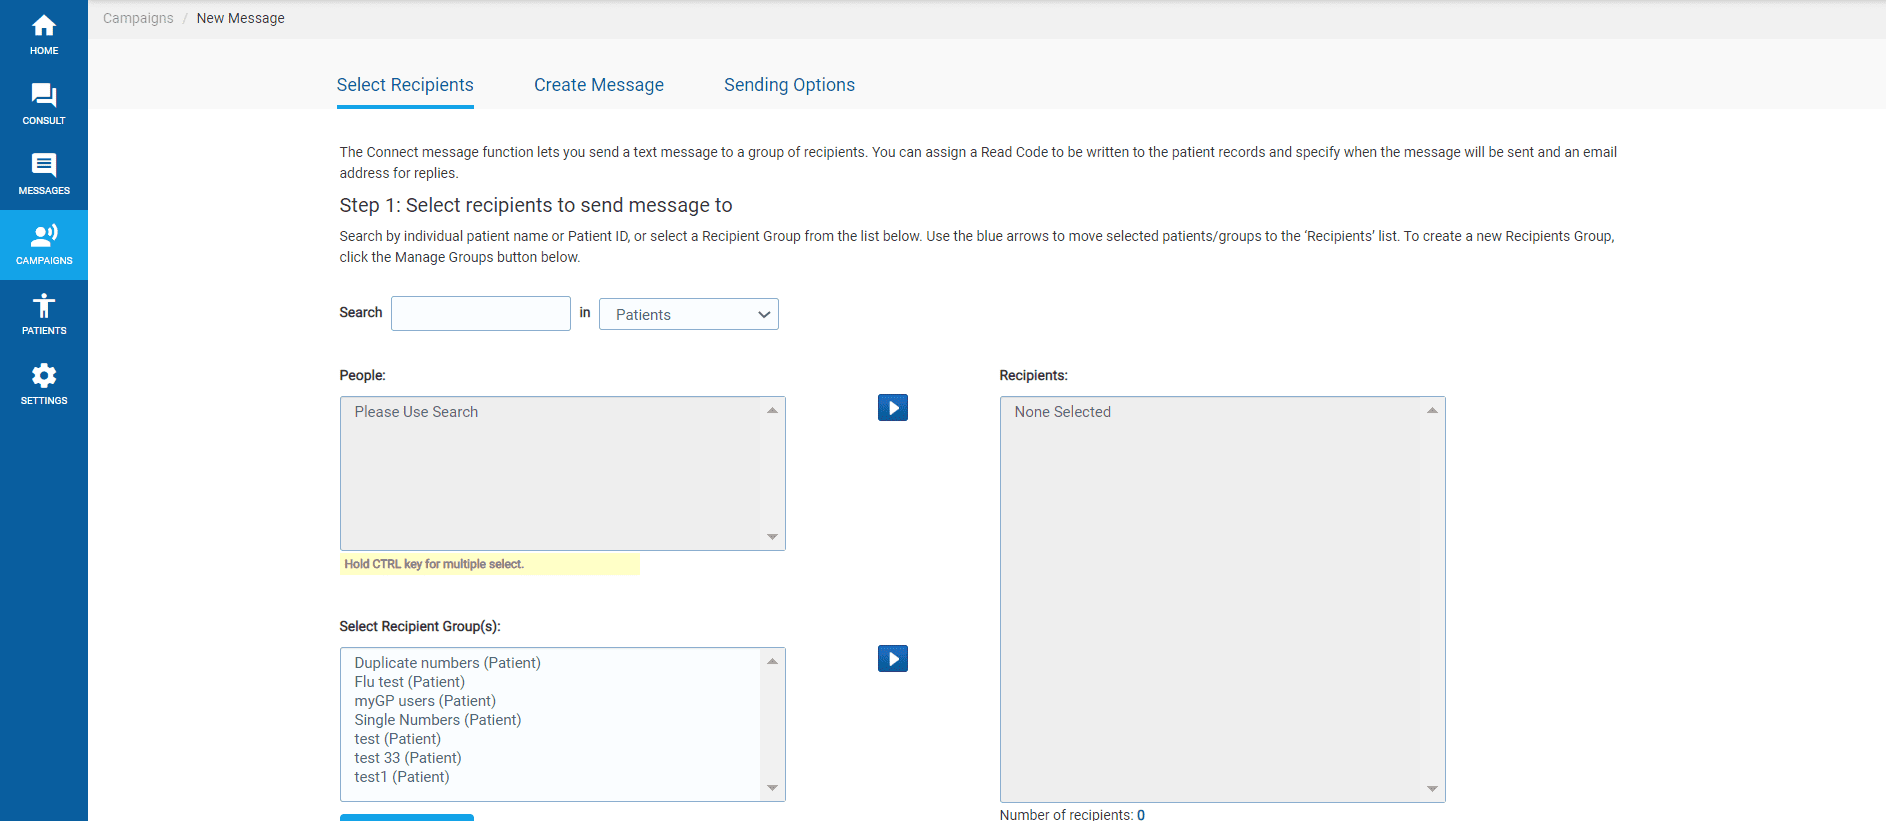
- Go to Campaigns from the left-hand menu
- Select New Message
- Assign receipts for the message on the Select Recipients page, then click Next
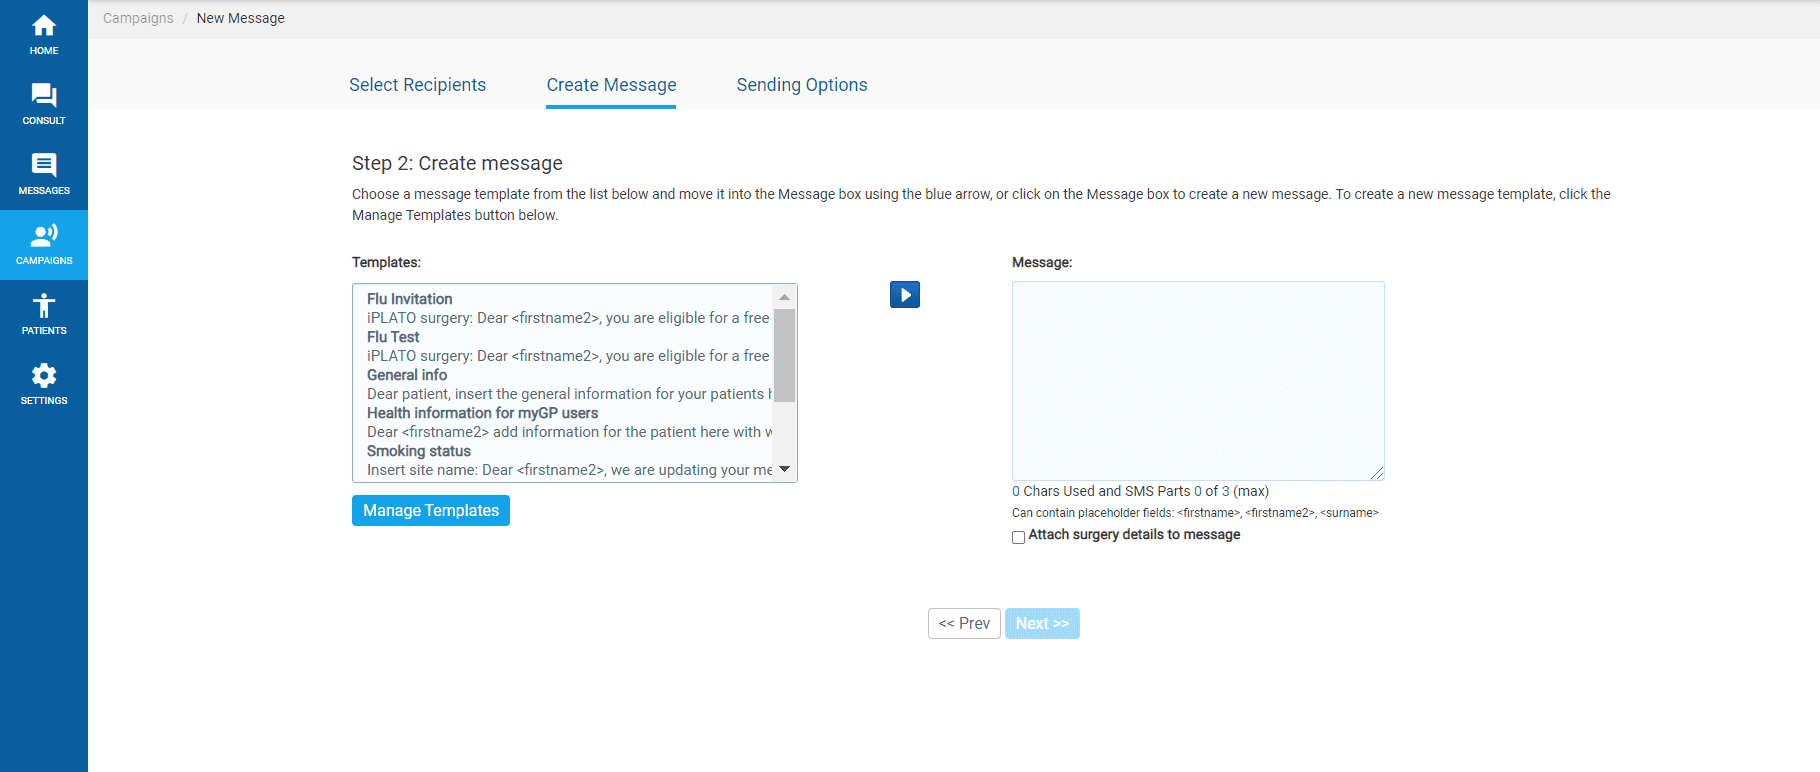
- Assign template or free-hand message on the Confirm Message page, then click Next
- On the Summary Confirmation page, go to the Read Code section and click Add
- A Read Code pop-up box will appear
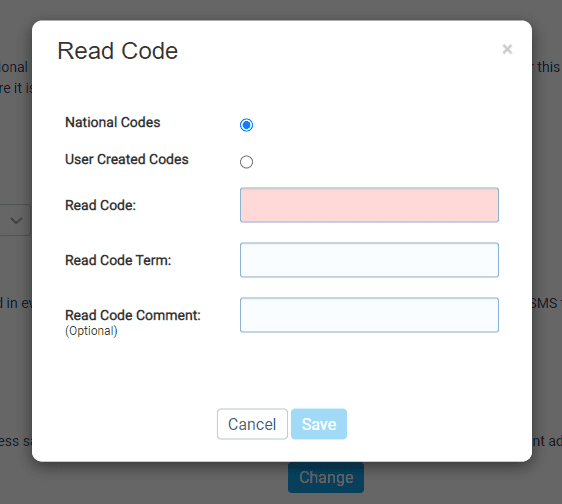
- Insert the clinical code you wish to assign within the Read Code field
- Once filled in, the Read Code Term will automatically fill in as well
- The Read Code Comment field allows you to add an additional comment to give more detail about the message (e.g. sent by SMS text)
- Click Save
This will now assign the selected clinical code to your message. Now follow the last steps of sending the message:
- Click Confirm to Send
- From the Message Confirmation Summary pop-up box, click Send
- Click OK on the pop-up confirmation
Your message has now been sent out with an assigned clinical code.
TOP TIP: You can also search the clinical code via the Read Code Term box, and then once selected, it will fill in the code automatically.